Introduction: How to get started
Goal of this chapter
This chapter provides a high-level description of:
- What is Excel VBA?
- What prior knowledge you are expected to have when starting the tutorial
- How to get Excel VBA to work in your Microsoft Office version in case it doesn't do so already
- A note on the appearance of different versions
What is Excel VBA?
Excel Visual Basic for Applications (VBA) is the programming language embedded in Microsoft Excel that can be used to make sophisticated workbooks or even user-defined applications. Though at first sight the VBA editing window is less straightforward than the standard worksheet Excel user-interface, in comparison it offers a nearly unlimited level of flexibility and much greater calculation power. As it is a version of Visual Basic specific for Excel there are many pre-defined parts and pieces available for quick and easy programming.
Prior knowledge
The only knowledge assumed necessary to follow this tutorial is the normal use of Excel. As long as you are reasonably familiar with Excel then it should be easy to follow the instructions of the tutorial to move around Excel. In case you do not know Excel at all, it is probably better to first explore the already extensive possibilities that Excel offers without the use of VBA. This tutorial is especially aimed at those with good knowledge of Excel who can substantially upgrade their work with only a bit of VBA knowledge.
Preparations
Three things you should check before starting the tutorial:
Firstly, you need to have Visual Basic for Excel installed on your computer. In my experience it is included already when you have followed the standard installation of Excel, for both Windows and Mac versions. Only in Windows Excel 2007 you might need to add it from the installation disc.
A quick way to test on either operating system if you have Visual Basic installed is to open a blank workbook and press ALT+F11 for Windows or Option+F11 on Mac. If the VBA editing window opens you are ok.
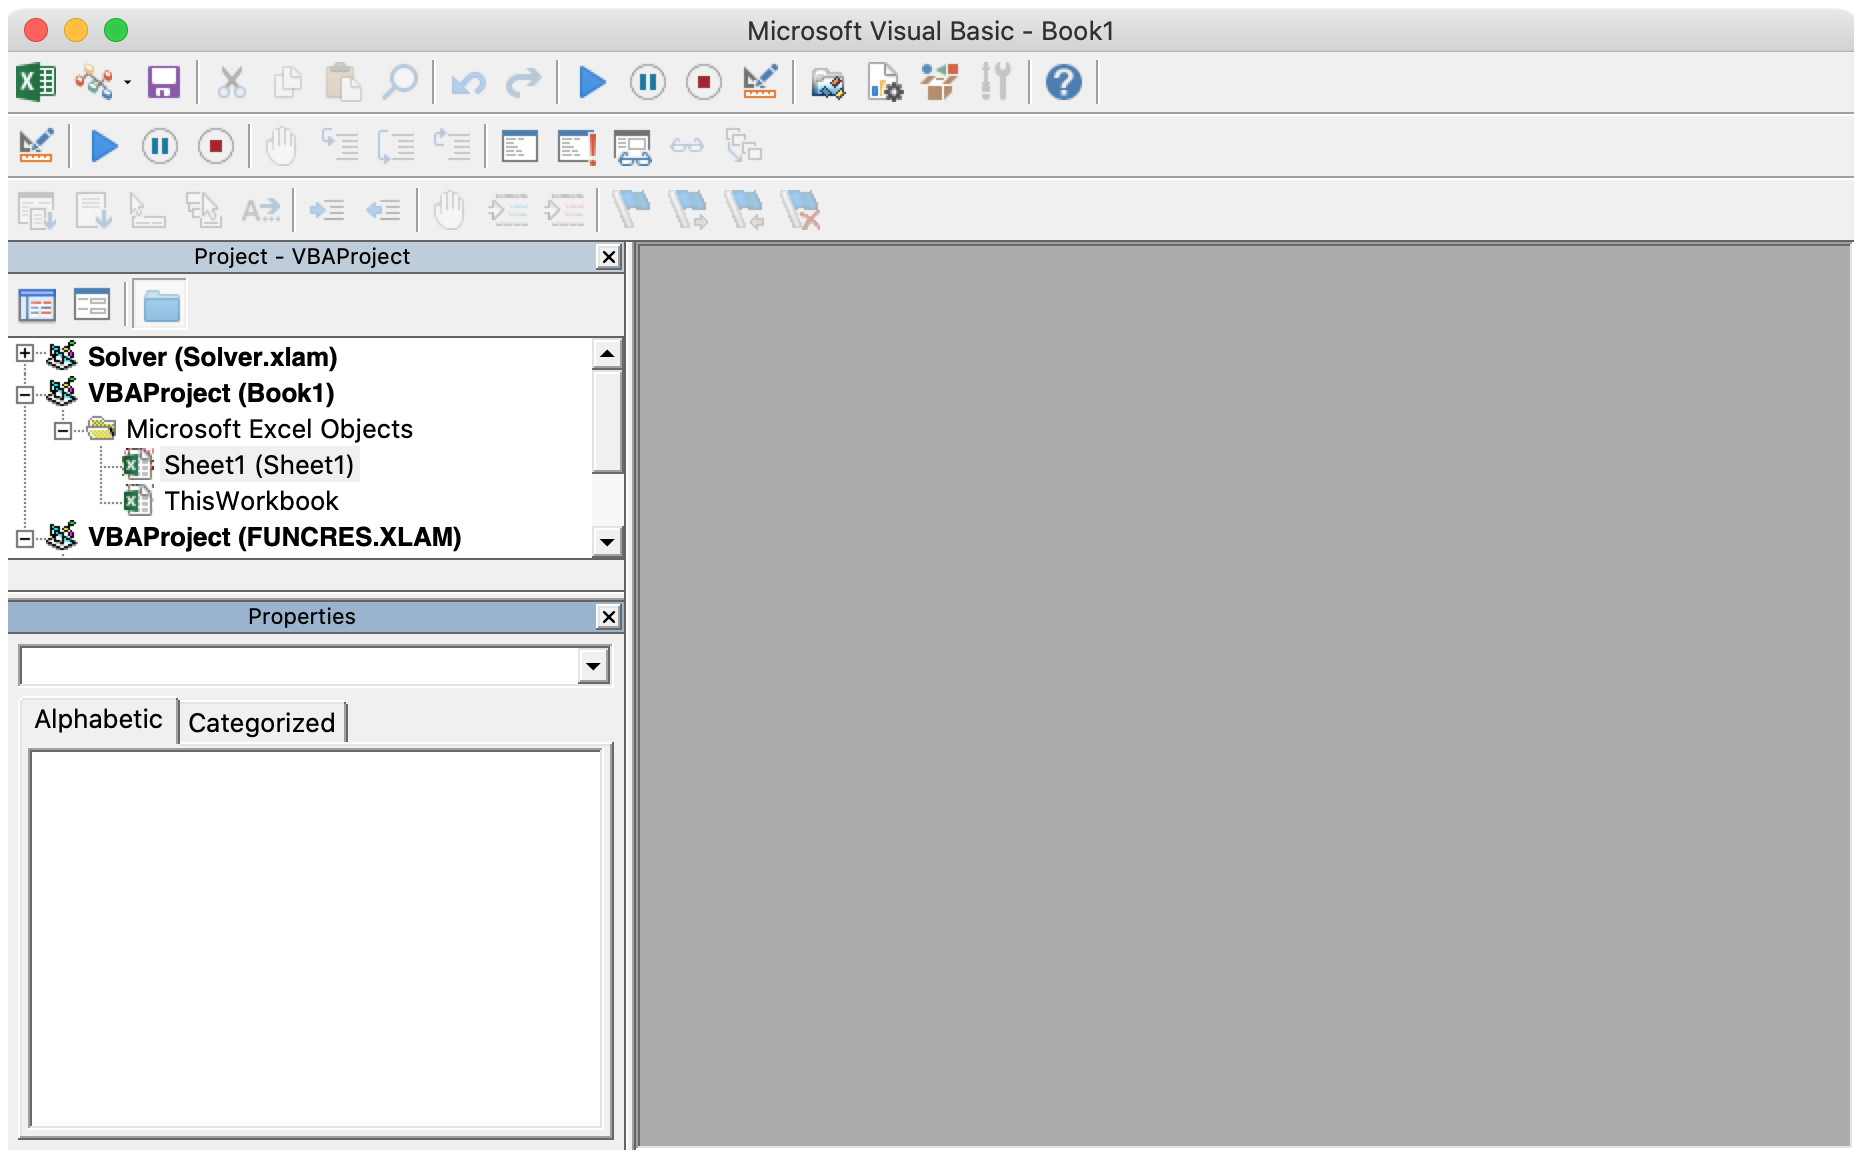
Figure 1: Image of Mac Office 365 VBA Editor window Alternatively, on Mac you can click “Tools” in the top Excel menu, followed by clicking “Macro” and then “Visual basic editor” (going forward I write such a menu sequence as “Tools -> Macro -> Visual basic Editor”).
If ALT+F11 did not work on Windows and you want to try accesssing the VBA Editor in a similar way on Windows as described for Mac then you probably first need to activate the Developer ribbon (see paragraph below). If you cannot complete those steps in your Windows version then you probably will have to install VBA. For Windows Excel 2007 you can do that in the Office installation, which you reach (on Windows itself, not in Excel) via “Control Panel -> Add/Remove Software -> Change Microsoft Office -> Office Shared Features” and follow the instructions.
Secondly, you need to be able to see the Developer ribbon, which may not be the case immediately in Excel versions since 2007. To add the Developer ribbon if required:
- For Windows Excel go to the “File tab -> Options (under Help) -> Customize ribbon” and there under “Main Tabs” tick the check box of the Developer ribbon on the right-hand side.
- For Mac 2011 and Mac Office 365 go to “Excel -> Preferences... -> Ribbon (in Office 365 Ribbon & Toolbar)” and tick “Developer”.
Through the Developer ribbon you can access the VBA Editor. Click “Developer -> Visual Basic”.
Thirdly, the macro security level needs to be set low enough in order for macros to be permitted to run on your computer. Depending on the version of Excel this is either:
- Windows Excel 2003 and before, go to “Tools -> Options -> Security -> Macro Security” and set the security level to medium so you can indicate whether or not to permit the execution of macros depending on the workbook you are opening.
- Windows Excel 2007 and later go to “Developer -> Macro Security” and tick the box of “Disable all macros with notification”.
- Excel for Mac 2011 go to “Excel -> Preferences... -> Security -> Macro Security” and tick the box “Warn before opening a file that contains macros”.
- Mac Office 365 go to “Excel -> Preferences... -> Security” and under “Macro Security” tick the box “Disable all macros with notification”.
A note on the appearance of different versions
Windows Microsoft Excel 2010 & 2013 and Microsoft Excel for Mac in Office 365 are the versions used in the tutorial for the illustrative images. The exact version of Excel you are using should generally be irrelevant when following this tutorial. The only difference between the Windows versions is the user interface of Excel where you might find buttons in a different place (but they should all be there) while the Visual Basic editor is the same for all Windows Excel versions.
The VBA editor does look slightly different in Excel for Mac, but also has the same functionality. Where commands or menus in Excel for Mac 2011 or Mac Office 365 are siginificantly different to those in the Windows version I have provided additional instructions for Mac.
Next: Chapter 1: How to record a macro